

How To Draw A Candle Flame
Candles hold a special place in many of our lives, as objects of peace, sometimes worship, and home. Lighting a candle gives us a moment to accept a jiff and adore the dazzler of the pocket-size flickering flame. In today'due south drawing tutorial, we are going to learn the fine art of cartoon candles step-by-step. Not but will nosotros show you how to create the dripping wax of your candle cartoon, but besides how to create a realistic candle flame cartoon.
Table of Content
- 1 Easy Pace-by-Step Guide to Drawing Candles
- one.i Step 1: Draw a Basic Cylinder
- 1.2 Step ii: Cartoon the Bottom Plate of Your Candle Sketch
- 1.3 Step iii: Shaping the Base of Your Candle Drawing
- 1.four Footstep 4: The Candle Flame Drawing
- 1.v Step five: Creating the Terminal Outline of Your Candle Drawing
- i.vi Pace 6: Calculation Some Color
- ane.seven Pace seven: Begin Coloring the Candle Drawing
- 1.8 Step 8: Adding Shadows to the Candle Holder
- 1.9 Stride 9: Calculation the Final Colors to Your Candle Sketch
- 1.10 Step 10: Finishing the Outline of Your Candle Sketch
- 1.11 Pace 11: Begin Coloring the Candle Flame Drawing
- 1.12 Step 12: Strengthening the Flame Color
- 1.xiii Footstep 13: Deeping the Flame Color
- i.xiv Footstep xiv: Finishing Your Candle Flame Drawing
- 2 Oft Asked Questions
- 2.one What Colors Can You Employ for Drawing Candles?
- ii.2 How Can You Make a Realistic Candle Flame Cartoon?
Like shooting fish in a barrel Step-past-Pace Guide to Drawing Candles
For many beginners and fifty-fifty more than experienced artists, starting a new cartoon projection can be a fiddling intimidating. To assist you nail your first candle drawing the first time, we are going to use a series of construction steps and shapes. These first steps will help us fix up the final shape of the candle sketch, allowing united states of america to add color and detail subsequently, without needing to erase whatsoever of our work. Structure shapes will also assist u.s. to ensure that our piece of cake candle drawing fits the canvas perfectly.
You tin see an outline of the steps in our candle drawing below.
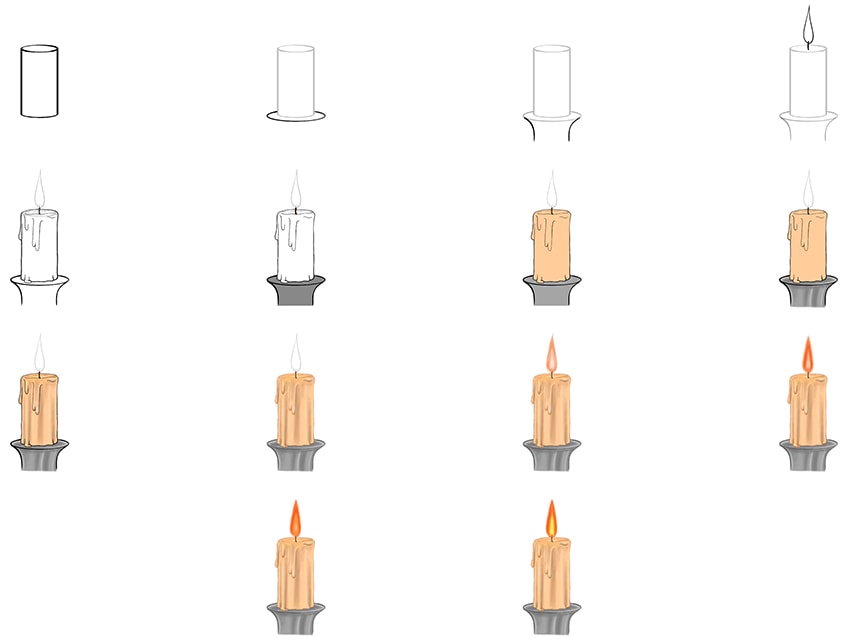
In the last viii steps of our candle drawing tutorial, we are going to begin calculation color. For these coloring steps, we are using a painting medium, but yous are welcome to choose your own medium. If yous are a digital artist, so you tin can easily use a drawing tablet, with the construction, outline, and coloring elements on unlike layers.
If you are working with a more than physical medium, like coloring pencils or paint, we propose using an hands erasable pencil for the construction steps.
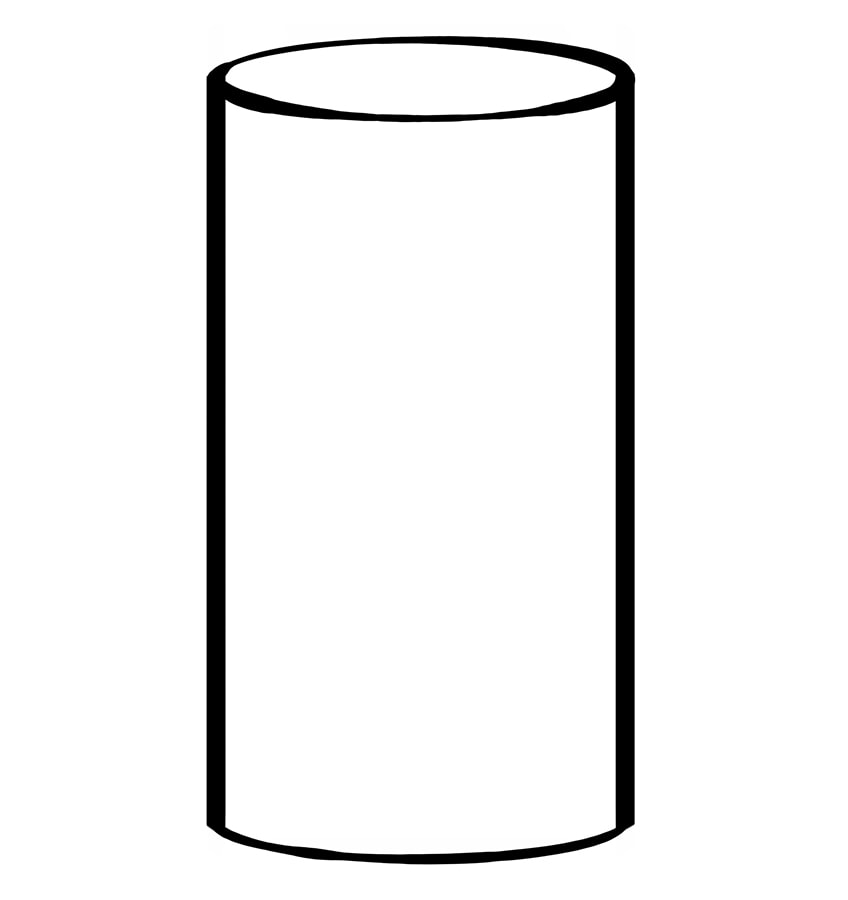
Step 1: Draw a Basic Cylinder
To begin your candle sketch, you need to find the centre of your canvas. When yous have located this point, draw a long cylinder. This shape will represent the base of your candle cartoon, and we will build on to information technology in the following steps by adding the flame and the candle base.
As such, brand sure that you leave enough of infinite above and below the cylinder.
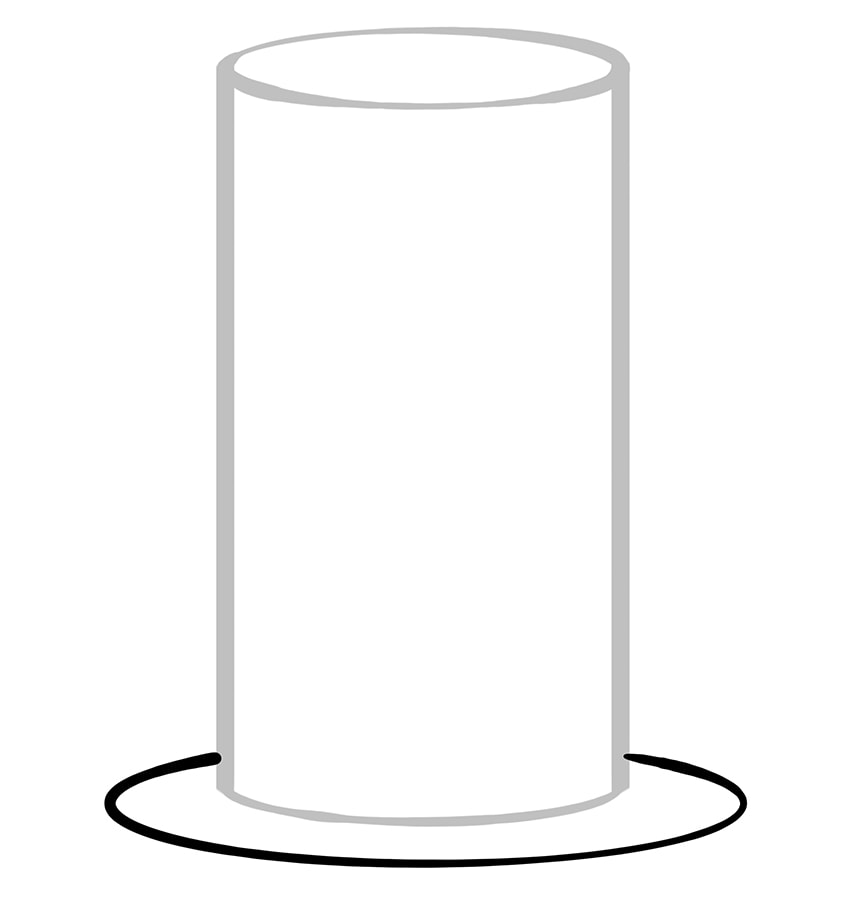
Pace ii: Drawing the Lesser Plate of Your Candle Sketch
At the base of operations of your cylinder, describe a narrow oval shape. This oval shape should be wider than the base of operations of the candle and should not extend downwards beneath it as well far.
In the following steps, we will use this base of operations shape to create the stand for the candle.
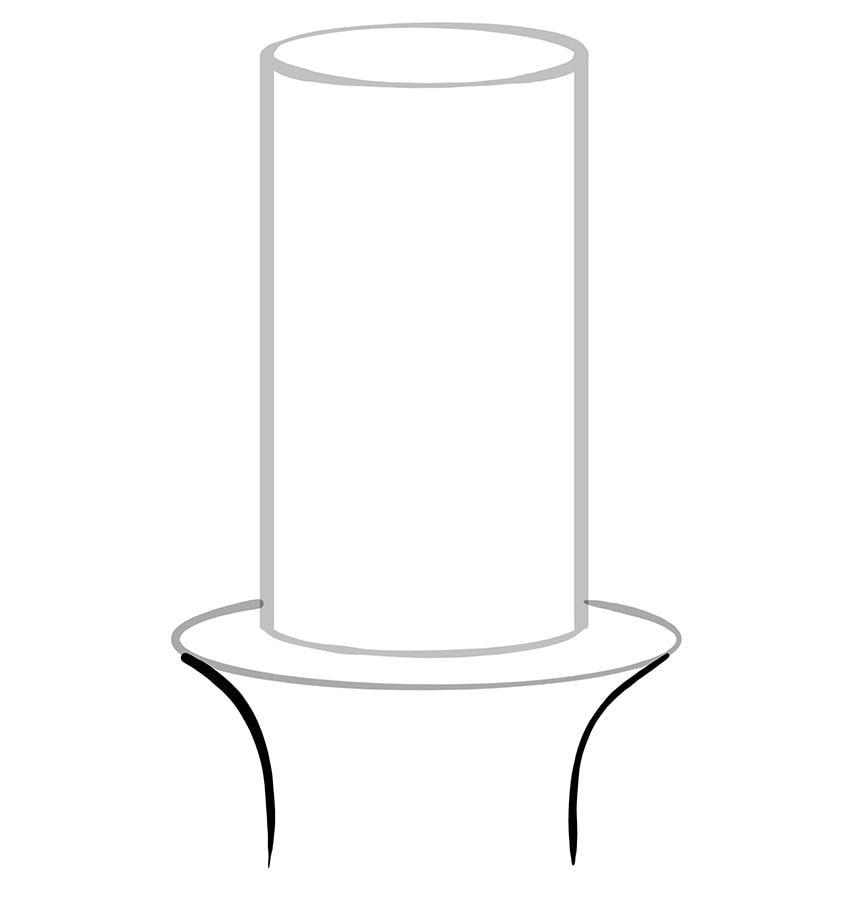
Step 3: Shaping the Base of Your Candle Drawing
In this step, we are going to now continue shaping the outline of the base of operations of your candle sketch. On each side of the bottom plate that yous drew in the previous step, you tin draw an arching line. These lines should sweep in and down, ending upward parallel.
The width of this base should exist the same as the candle.
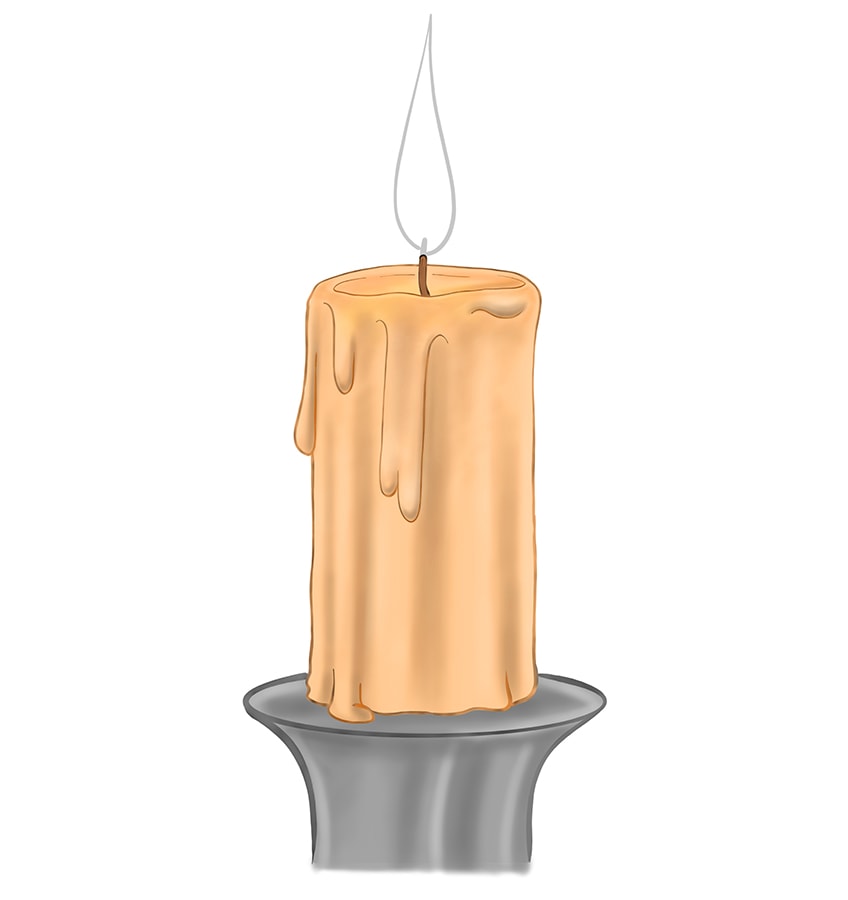
Pace 4: The Candle Flame Drawing
Nosotros now move on to the candle flame cartoon. Discover the primal bespeak of the top of your cylinder, and describe a brusque line to stand for the wick of your candle sketch. From the summit of this wick line, you can now draw the flame of your candle sketch.
The flame should exist wider at the bottom and come up to a curved point at the top.
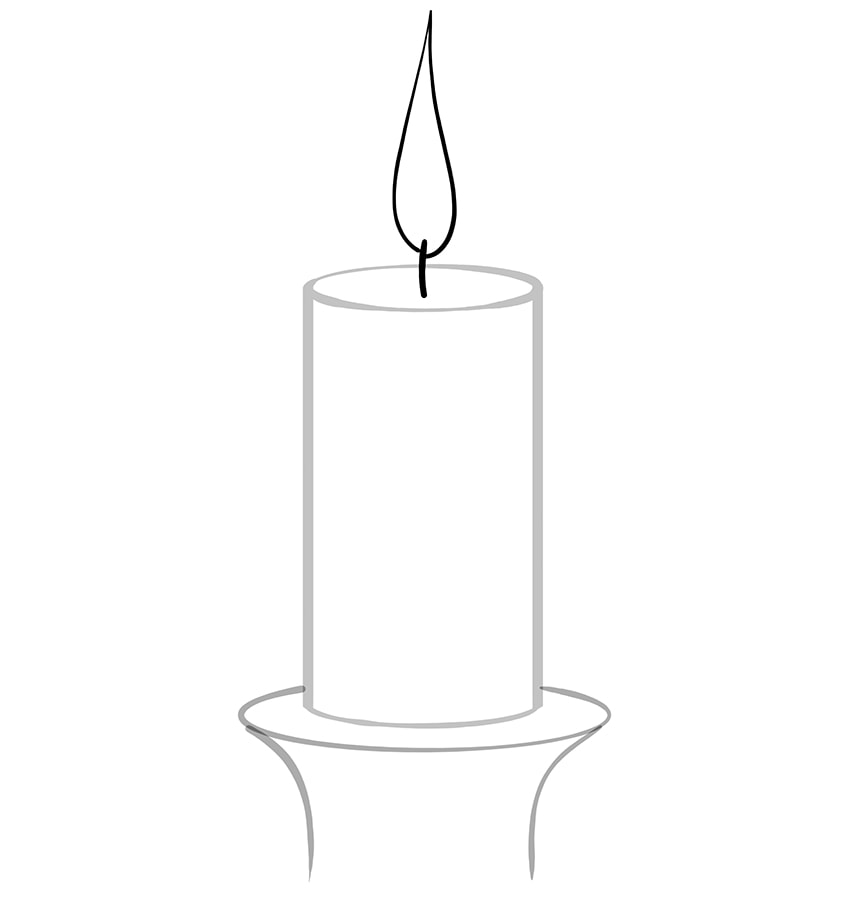
Step 5: Creating the Final Outline of Your Candle Drawing
In this step, we are going to outline the shape of our candle sketch in a more realistic way, adding melted wax texture to the construction shape. Use the construction shape to help you with the final shape, rounding off the corners, and calculation some long drips of wax to the top and bottom of the candle. Outline the wick, making it a niggling thicker. After yous have finished this detailing, yous tin can erase the construction lines, except for the flame.
We volition use the flame structure shape in subsequently steps to help u.s.a. with the coloring.
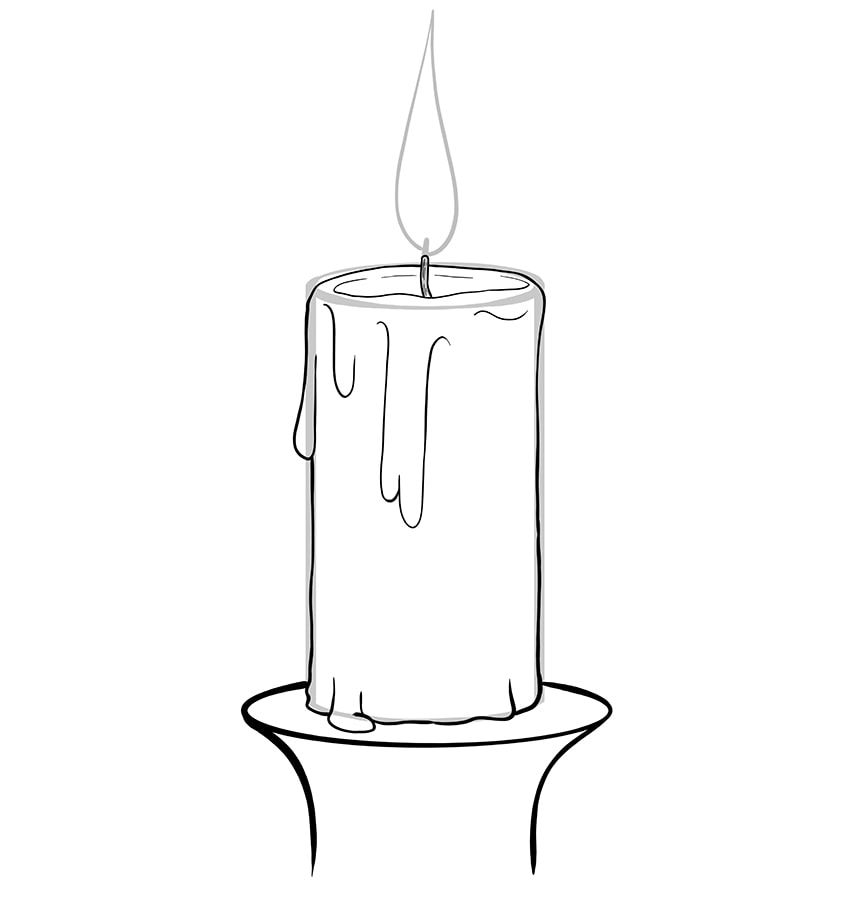
Step 6: Adding Some Color
To begin our coloring process, we are going to add color to the base of operations and to the wick of our candle sketch. Use a regular paintbrush and some dark grayness pigment to fill in the base of the candle holder. Make sure that the coat of color is even and does not have any blotches.
Next, for the wick, utilise some dark brownish paint and a very fine paintbrush to make full the shape.

Step vii: Begin Coloring the Candle Drawing
Y'all are now going to add a base of operations color to the column of your candle. Find a tan or light peach-colored paint and a regular castor to fill up the entire shape of the wax candle. Once once again, make sure that this coat of color is even and does not have whatsoever spots of darker color.
In the adjacent few steps, we volition use a few different shade variations to add depth and dimension to our candle drawings.

Step eight: Adding Shadows to the Candle Holder
To create more dimension in the base of your candle holder, you tin can now use a blending brush and some dark gray pigment. Around the lesser of the plate and along the edges of the base, gently alloy in some shadows to create dimension and depth.
To finish the shaping of the base, use a small blending brush and some white paint to add several strokes going downwardly the base.
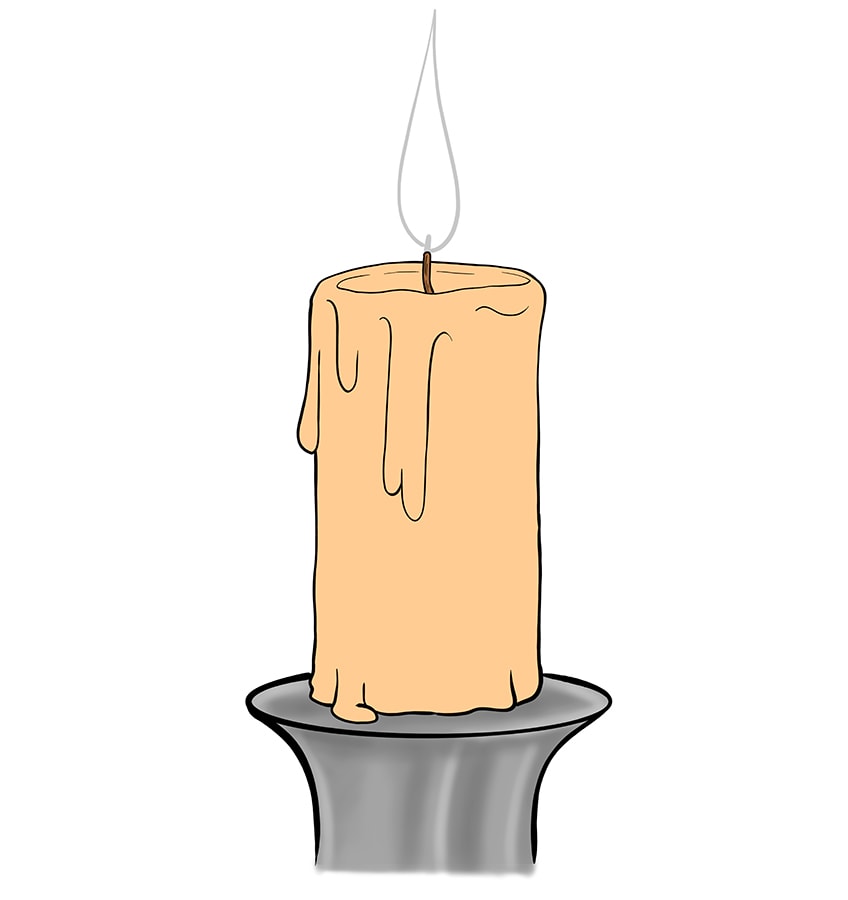
Step 9: Calculation the Final Colors to Your Candle Sketch
Now, use a soft castor and some dark gray paint to add some shadows to the melting wax lines. This will aid create some construction inside the shape of the candle. Then, notice some xanthous paint and a pocket-size blending brush, and apply this to add a slight glow around the base of the wick. You can and so echo this process with a lite orangish hue. To smooth out this blend, employ a clean soft brush to blend the shades together.
To finish the step, use a minor blending brush and a touch of white paint to very lightly add some highlight lines betwixt the kickoff color glaze and the shaded lines.
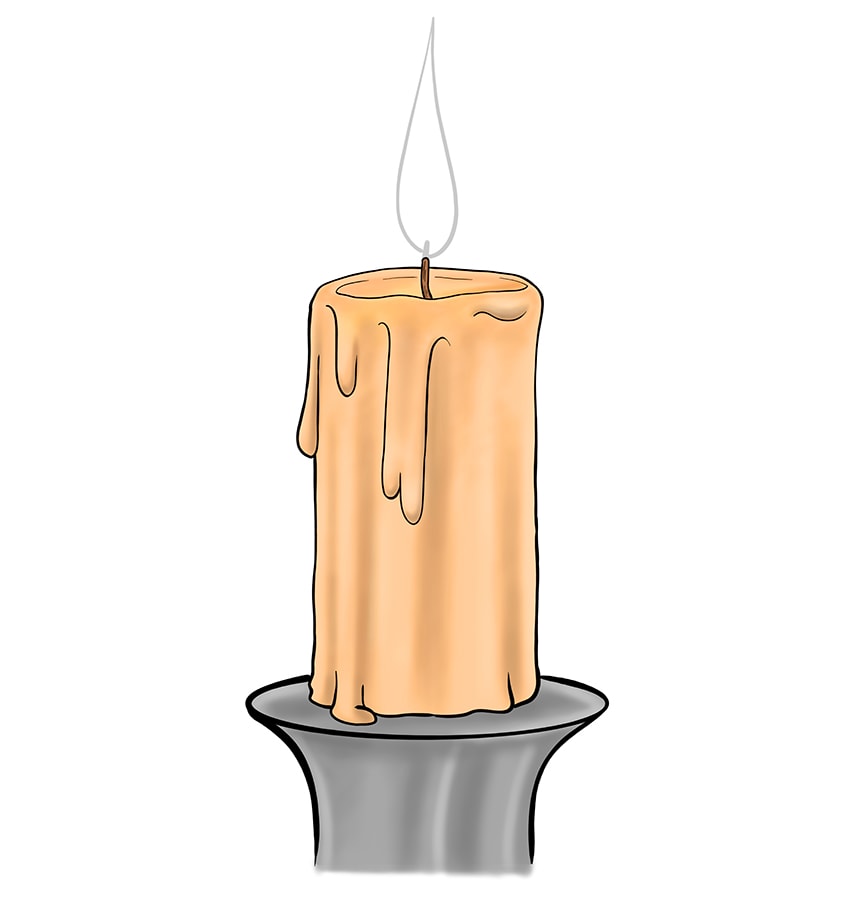
Stride x: Finishing the Outline of Your Candle Sketch
Before we move on to coloring the candle flame drawing, we are going to erase the harsh outlines effectually the candle and the base. Utilise a fine brush and some greyness pigment, and advisedly trace the outline of the bottom plate and base. For the candle cavalcade, use the same shade of peach or tan that you did for the coloring and carefully trace the outlines of the candle, wick, and wax lines.
Y'all volition now have a seamless candle drawing without any visible nighttime outlines.
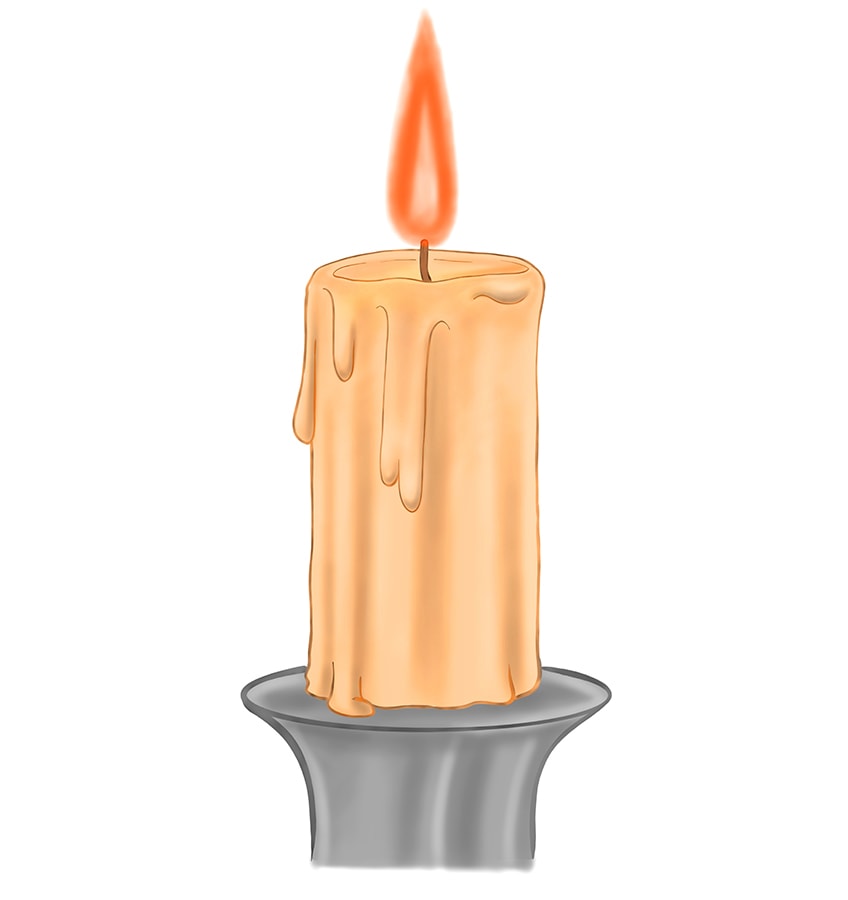
Step eleven: Begin Coloring the Candle Flame Drawing
Now that we have the colors downwardly for the majority of the candle, we can move on to color the flame. Utilize a soft blending brush and some lite orangish pigment to colour over the construction lines of the flame.
Leave some of the inner flame bare, as we volition be adding a different color to this part of the flame.

Footstep 12: Strengthening the Flame Color
This stride is very quick and elementary. All that yous need to practice hither is repeat the previous pace, darkening the exterior of the flame. Use a slightly brighter shade of orange for this step.
The utilize of different shades of orange will help to create a seamless and natural blend within the candle flame drawing.
Footstep 13: Deeping the Flame Color
We are now going to add a third orange colour variation to the center of our candle flame cartoon. Apply a small blending castor and a very low-cal shade of orange for this step. Inside the outer alloy of orangish, add this lighter shade of orangish to the inner area of the flame.
You still desire to leave a very minor bare space at the very center of your flame.

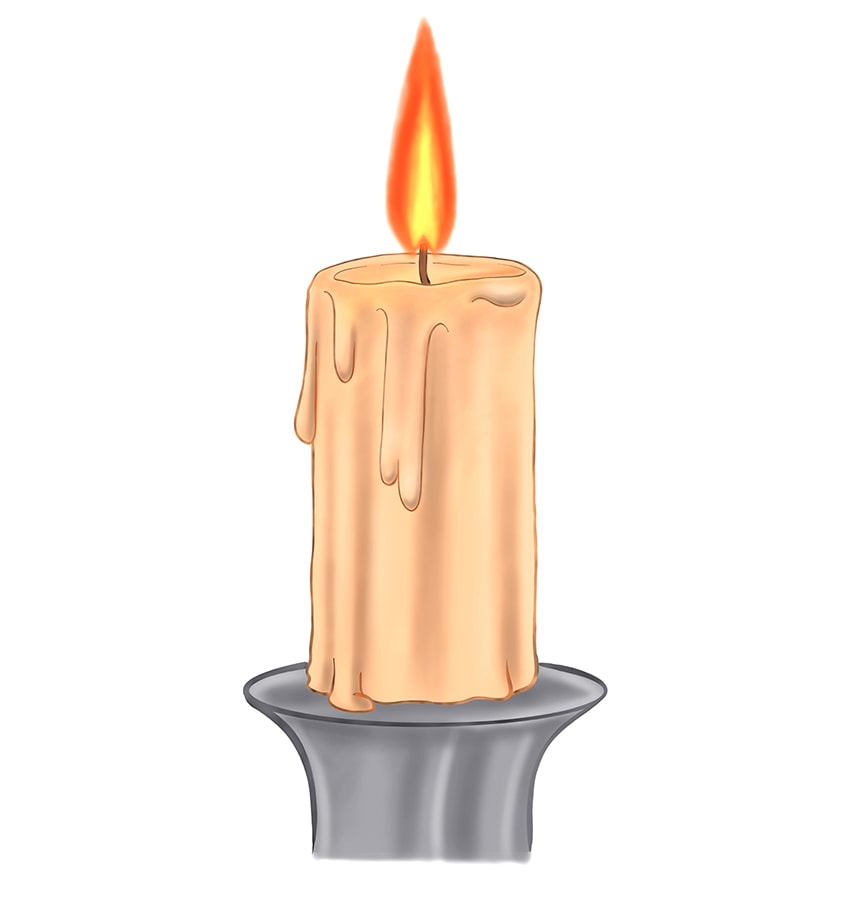
Step 14: Finishing Your Candle Flame Drawing
To finish your piece of cake candle drawing, notice a bright yellow shade of color and a soft castor to add a brighter spot to the center of your flame. To finish your candle sketch, use a clean blending brush to smear and alloy the flame colors together.
This will create a more realistic and seamless glow.
How easy was it to create a beautiful and seamless candle drawing? With construction lines and a few seamlessly blending colors, you can create a realistic and easy candle drawing in only fourteen steps! We promise that yous accept enjoyed the procedure of drawing candles, and now that you know the basics, y'all tin describe a broad range of dissimilar candles!
Frequently Asked Questions
What Colors Can You Use for Drawing Candles?
The colors that y'all tin use for an piece of cake candle drawing really are endless. We have used tan shades to create a neutral candle, but as you know, candles come in a wide range of different and exciting shades! For the flame, a blend of unlike shades of orangish and yellow tin create a realistic flickering result.
How Tin can Yous Make a Realistic Candle Flame Drawing?
The flim-flam to making a realistic flame drawing lies in the colors yous use and the mode that you blend them together. Y'all should employ three unlike shades of orange and yellow, with the darkest shades around the edge and the brightest yellowish in the center.

Source: https://artincontext.org/how-to-draw-a-candle/
Posted by: frazieryounly.blogspot.com
0 Response to "How To Draw A Candle Flame"
Post a Comment